

Sefthy is the ideal solution for Backup and Disaster Recovery of your devices, allowing you — in the event of failure or disruption — to continue accessing resources with the same local IP, as if nothing had happened.
To achieve this, several key components are involved: the Connector and the Backup Method. The Connector acts as a bridge between the local network, where the protected devices reside, and our Cloud, where they are restored in the event of a disaster. The Backup Method is responsible for saving devices backups to our storage, keeping the data up-to-date at all times and allowing you to choose the time point at which to restore the state of the device.
When Disaster Recovery is initiated, a Virtual Machine with the Recovery Operating System is started in our Cloud, which will ask you which restore point you wish to use.
Once the Recovery is complete, the Connector establishes a connection to the Virtual Machine allocated in the Cloud, making it accessible locally as if it were directly connected to your site.
The Connector is one of the fundamental elements for the operation of the Disaster Recovery.
The Connector's function is twofold:
- Under standard operating conditions, it monitors the status of the devices integrated into the Disaster Recovery Plan;
- When the Emergency Procedure is activated, it establishes a network link between the company infrastructure and the restored resources, ensuring accessibility without requiring changes to the existing network configuration.
How it works
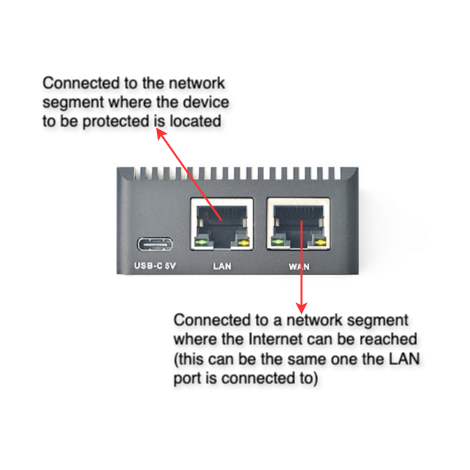
By default, the WAN network card is configured for DHCP (it can be set statically), while the Cloud Extension Interface ("LAN" on physical NanoPi devices) is part of an empty bridge with no IP address.
Both interfaces can be connected to the same network segment without causing loops or malfunctions. It is essential that there is connectivity in the WAN and that the Cloud Extension Interface is connected to the segment containing the server or workstation to be recovered in the event of a disaster.
When the Disaster Recovery procedure is initiated, a VXLAN interface is enabled on the Connector and placed within the Cloud Extension Interface bridge. This allows for a Layer 2 connection between the recovered cloud resource and the site where the Connector is installed.
Connection example (NanoPi R2S)
The connection is similar on other physical/virtual devices.
Web Interface
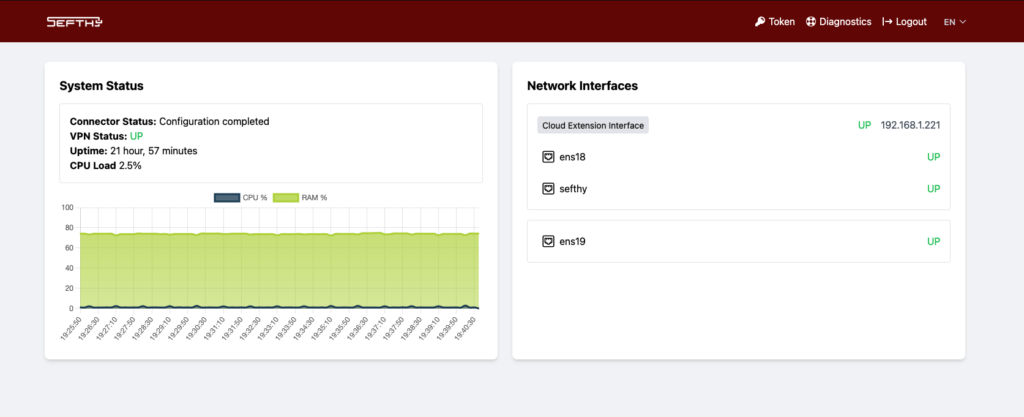
Within the Connector, in addition to the various service components, there is a web interface that allows the user to check operational status, change the network configuration, and perform diagnostic operations.
Different types of connector are currently available:
- x86_64 devices
- Mikrotik devices
- OpenWrt x86_64
- NanoPI R2S / R3S
The Backup Method currently available is Sefthy Agent for Windows and Linux. It will soon be possible to integrate it directly on VMware and Proxmox hypervisors.
Sefthy Agent is ideal in both physical and virtual Windows/Linux* server or workstation environments and once installed you can monitor it and manage backup settings from our Sefthy Console.
Compatibility:
Learn more about Sefthy Agent installation
In order to create a new Disaster Recovery, it is necessary to add the data related to the customer or location where you want to deploy the DR.
Just log in, then go to Customers → Add Customer and fill in the required fields.
You are ready to create the DR from the Disaster Recovery section, through the Setup a new DR button. Choose the desired plan, give it an identifying name, and associate the customer.
Now you can configure the Connector and the preferred Backup Method.
Sefthy can protect your servers even if they are already on another infrastructure.
Setup is simple:
- Add a new DR;
- Create a connector (it won't be "real", it can't be used in this context) and open a ticket so we can confirm it;
- Just install our Agent and customize your backup schedule.
Important Information about IP Addresses
It's important to know that, in the event of a disaster recovery, the server will be assigned a new IP address. You won't be able to keep the original one provided by your current provider.
Once Disaster Recovery is activated and the recovery point is selected, you can immediately access the recovered server in two ways:
- Via Emergency VPN
- By assigning a Public IP: to make the machine accessible from the Internet again.
Need help? Our team is available at console.sefthy.cloud.
Once activated the Disaster Recovery Plan within the Sefthy Console, you can add the Connector by selecting Add and choosing x86 Device from the available methods.
x86 Device installation
The ISO version of the Connector can be installed either on physical hardware or in a virtual machine within your own infrastructure.
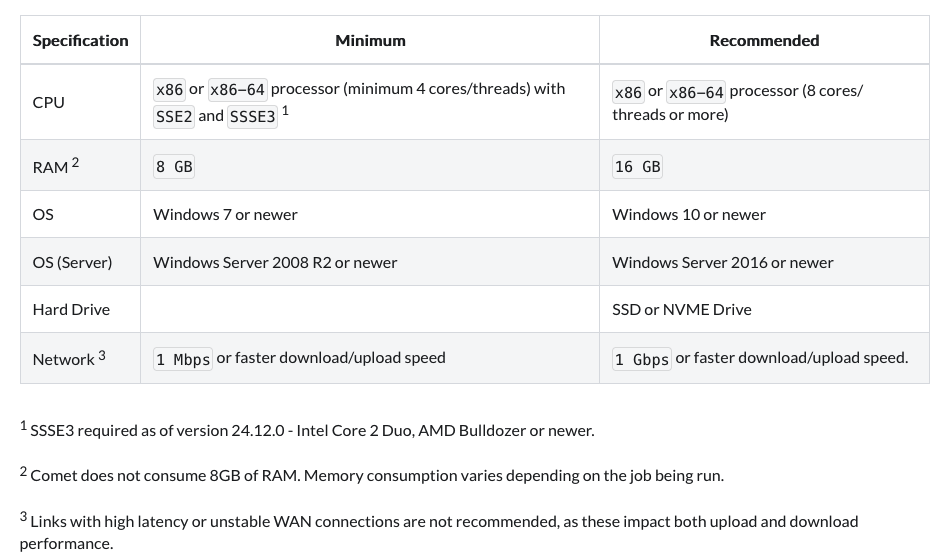
Below are the minimum resources required:
- 2 CPU cores
- 1 GB RAM
- 10 GB HDD
- 2 Ethernet NICS in BRIDGE MODE (not NAT mode)
The installation, lasting about ten minutes at most, guides us in a few simple steps to configure the essential parameters for operation:
1. First we select the desired language.
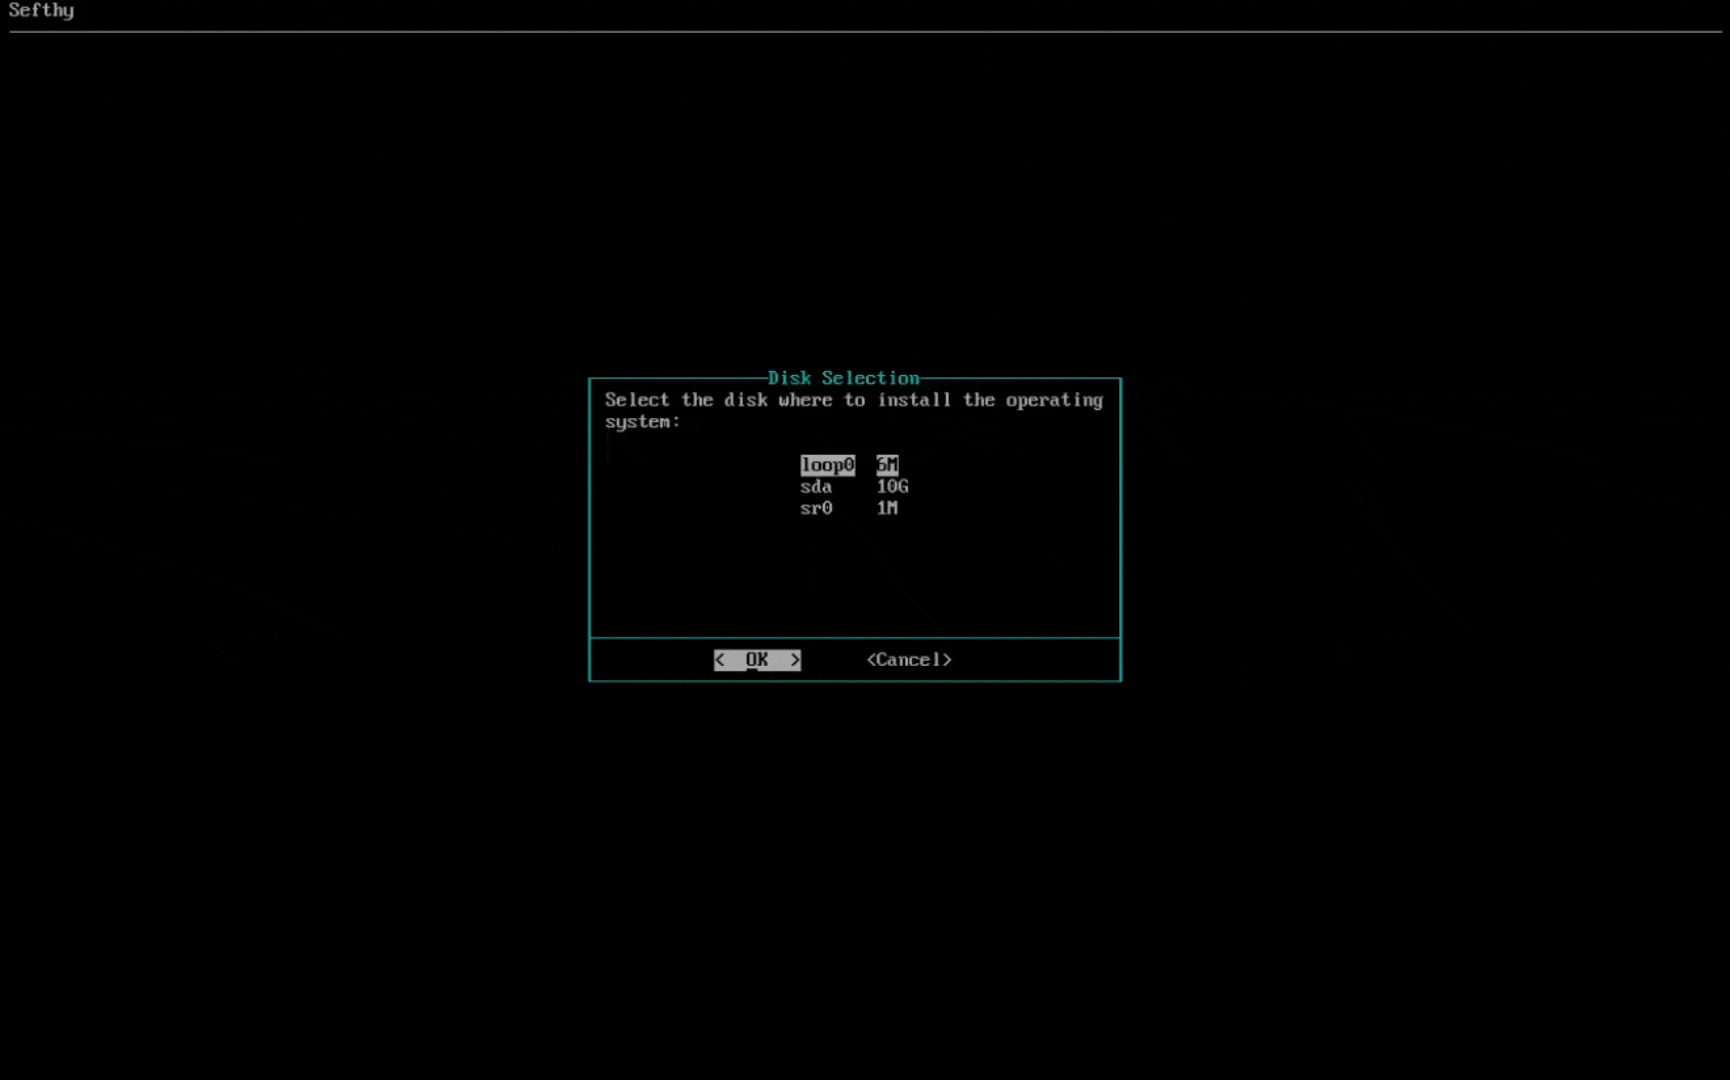
2. Choose the disk where the operating system will be installed.
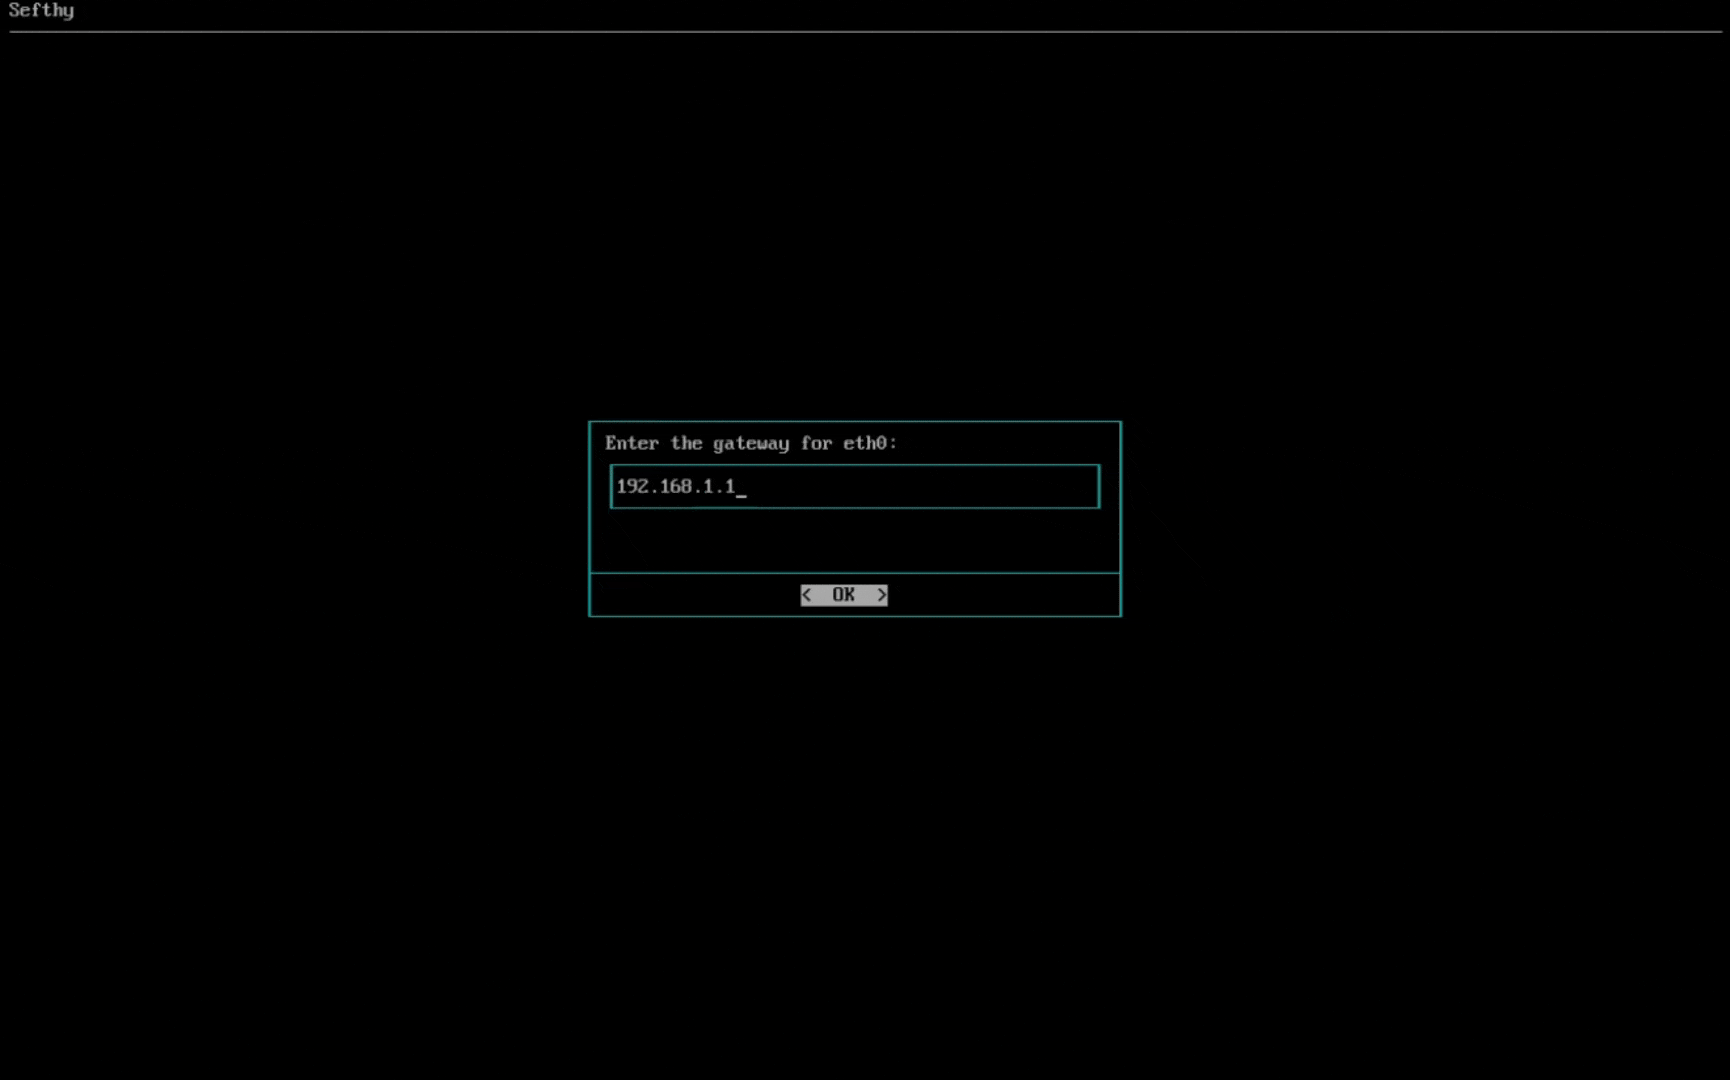
3. Select the network card that will allow our Connector to connect to our infrastructure through the Internet. You can choose the IP configuration between DHCP or Static (recommended).
4. Select the network card for Cloud Network Extension (it must be physically connected where the resources that need to use Disaster Recovery are present and be in BRIDGE mode, so the Connector can reach the same L2 broadcast domain of your device).
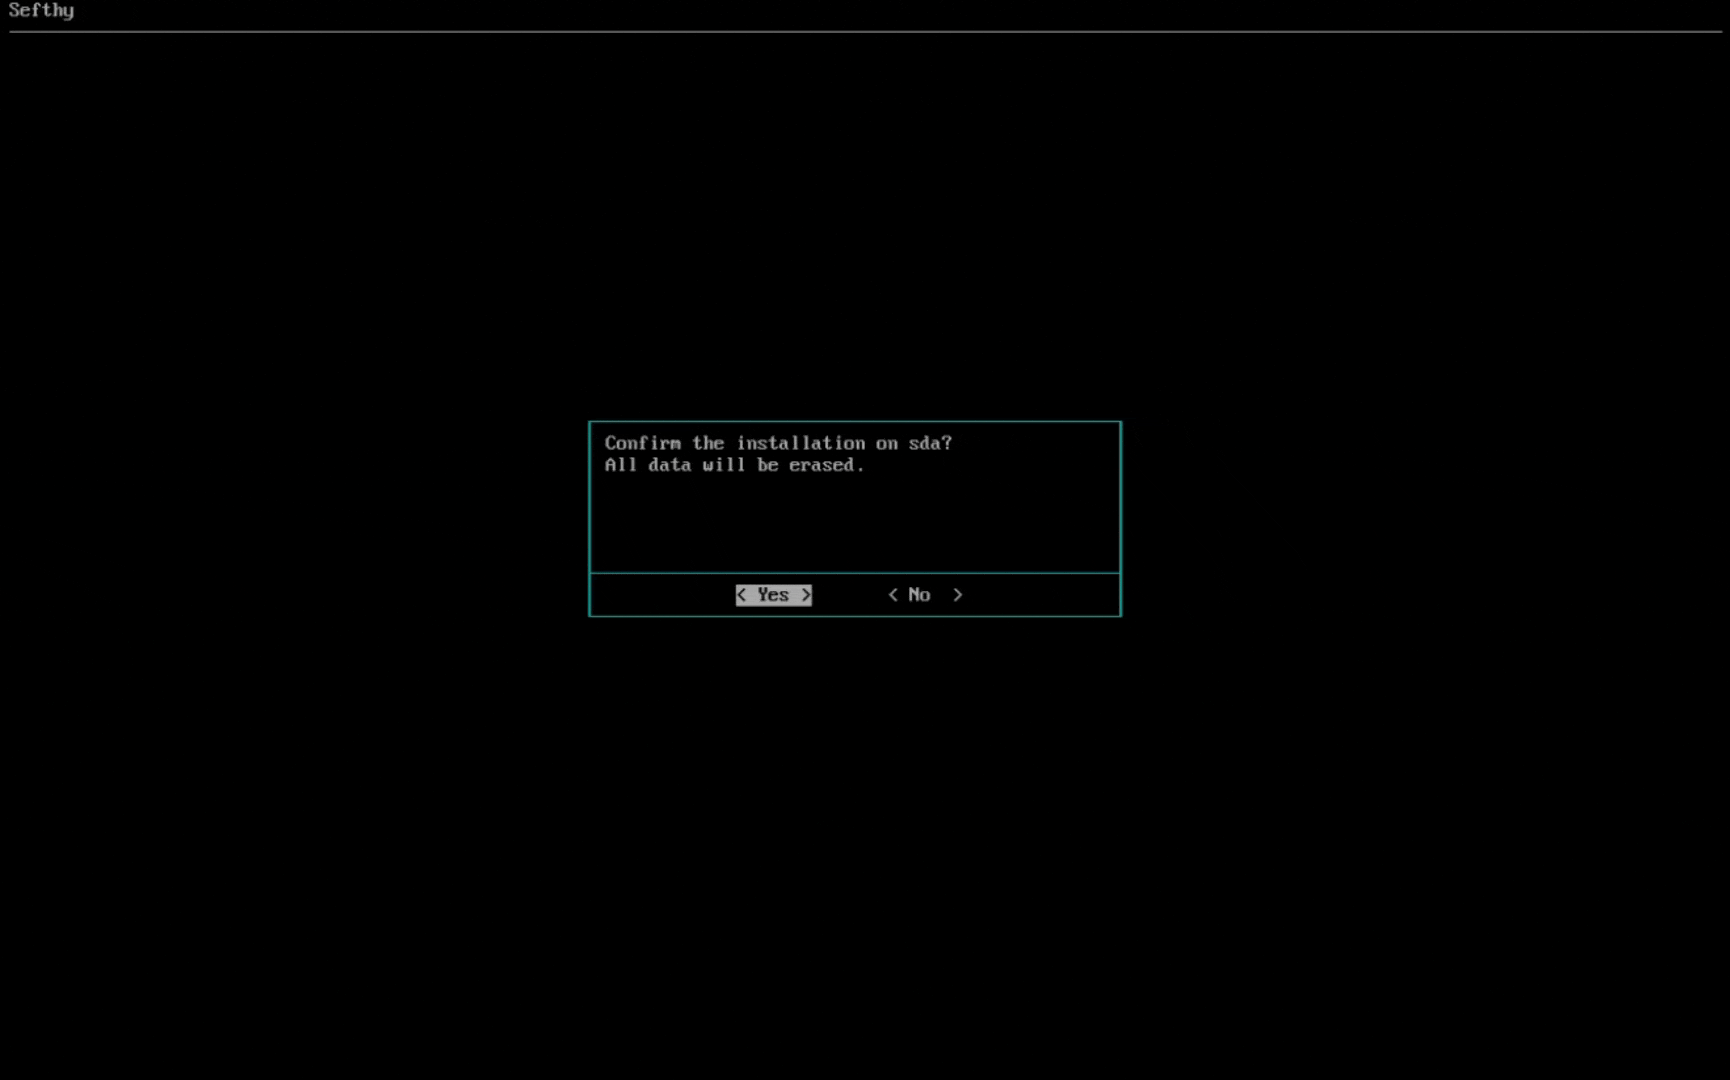
5. Wait for the installation to complete. The installation will proceed with copying and configuring the system according to the parameters we chose in the previous steps.
At the end of the installation, simply remove the ISO and restart the machine.
Once the boot process is complete, you can connect to the connector's web interface to enter the Activation Token:
1. Go to http://<CONNECTOR_IP>
2. Log in with the default password: Sefthy. You will immediately have to choose a new custom password.
3. Go to the “Token” menu item and enter the activation key we provided.
Please note: to use the connector on Mikrotik routers, you must have a physical or virtual device (CHR) with arm64 or x86 architecture and RouterOS version >=7.
Once activated the Disaster Recovery Plan within the Sefthy Console, you can add the Connector by selecting Add and choosing Mikrotik Router from the available methods.
⚠️⚠️ Requirements ⚠️⚠️
On the router, if it is not already enabled, enable the Container package. To do this you must first download the extra packages corresponding to your router's architecture from the Mikrotik website, copy the container-*.npk file to the router's storage, and then reboot it.
Once rebooted, from the Winbox terminal, run the command /system/device-mode/update container=yes. You'll be prompted to remove the power to apply the changes.
Mikrotik Router installation
From Sefthy Console copy the commands to install the Connector and run it inside Winbox terminal or SSH.
Once the installation is complete, start the Sefthy Container (only needed the first time) and the web management interface will be available at http://172.17.255.2/ in a few seconds.
From this page we will be able to set the Activation Token and the lan bridge, where the device under backup is present, to be used in case of Disaster Recovery.
1. Go to http://172.17.255.2
2. Log in with the default password: Sefthy. You will immediately have to choose a new custom password.
3. Go to the “Token” menu item and enter the activation key provided.
4. In the “Network” section, select the bridge to be used in case of Disaster Recovery.
Once activated the Disaster Recovery Plan within the Sefthy Console, you can add the Connector by selecting Add and choosing Openwrt from the available methods.
Openwrt installation
Below are the minimum resources required:
- x86_64 architecture
- 85 MB free disk space
- A bridge from which you can reach devices to be restored in L2 in case of disasters
On Openwrt the installation is done through a script that installs all the dependencies and adds a "Sefthy GUI" entry to the main menu of the router management interface.
Run the command curl https://static.sefthy.cloud/openwrt/install.sh | sh
Once the installation is complete, you can open to the connector's web interface to enter the Activation Token and select the bridge interface:
1. Go to http://<ROUTER_IP>:81 or click Sefthy GUI on Openwrt's main menu
2. Log in with the default password: Sefthy. You will immediately have to choose a new custom password.
3. Go to the “Token” menu item and enter the activation key we provided.
4. Go to the “Network” menu item and select the bridge to be used in case of a Disaster Recovery.
In case a disruption has occurred on the device we are protecting, you can launch a Cloud Restore with the Connector. This will recreate the device on our Cloud, restore it to the chosen time point and it will be reachable through the local IP.
If your backup method is Proxmox Backup System, skip steps 1-5.
Has a site-wide problem occurred and you want to have the device reached through a VPN? Read more about How to perform a cloud restore with Emergency VPN.
To proceed with the Cloud Restore enter the detail page of the DR and select Initiate DR. Select Cloud and then Restore with Connector
From this point on, the counter of the "Recovery Days" included in your Sefthy Plan will start (7 days for TRIAL plan, 10 days for Sefthy plan and 20 days for Sefthy PRO plan).
1. Select the snapshot from which you want to restore your device to the cloud, then select which disks you want to restore (by default, all).
2. The system will automatically perform the restore, and a status bar will display the percentage of completion.
3. Once completed, the Virtual Machine will be rebooted and start booting the restored operating system. By entering into the VM details (Main Data section on the left) and clicking Open Remote Console you'll see the restored device GUI. Log in and verify that the network card is configured correctly (if the original static ip is not present you can set it).
From this moment the device will be reachable from your local network as if it were physically at its own location.
In case a disruption has occurred on the entire site where the Device is located, a Cloud Restore can be launched with the Emergency VPN.
If your backup method is Proxmox Backup System, skip steps 1-5.
See also How to perform a cloud restore with the Connector.
To proceed with the restore enter the DR detail page and select Initiate DR.
Select Cloud and then Restore with Emergency VPN
From this point on, the counter of the "Recovery Days" included in your Sefthy Plan will start (7 days for TRIAL plan, 10 days for Sefthy plan and 20 days for Sefthy PRO plan).
1. Select the snapshot from which you want to restore your device to the cloud, then select which disks you want to restore (by default, all).
2. The system will automatically perform the restore, and a status bar will display the percentage of completion.
3. Once completed, the Virtual Machine will be rebooted and start booting the restored operating system. By entering into the VM details (Main Data section on the left) and clicking Open Remote Console you'll see the restored device GUI. Log in and verify that the network card is configured correctly (if the original static ip is not present you can set it).
Now you can use the Emergency VPNs generated through Sefthy Console. In the Main Data pane of the DR there is a section about it where you can manage the VPNs.
Device restored to the Cloud will have a public IP and will be reachable with the local IP from the various connected VPN clients.
In case a problem has occurred on the server or workstation we are protecting, a local restore can be initiated. With this feature you can launch our restore iso on a new machine and do a clone from one of the available restore points.
Local restore is only available for Sefthy Agent backup method.
To proceed with the Cloud restore enter the detail page of the DR and select Initiate DR. Select Local and then Confirm.
1. Download the restore.iso file from the console, then start recovery from usb/cd on the new machine and log in with the credentials provided. The system will ask for the name of the device. Just leave the default one and click on Register.
On the Sefthy console click on the Next Step button, then proceed on the restore system.
2. Click on Restore, then Next, check the Show items from other devices box and select the desired restore point.
Choose Restore to physical devices, click Next, check the Source and Restore to boxes and then click Add to restore queue and finally Restore.
It will start copying the selected backup to the Cloud System, wait for completion.
3. Once completed (Status: Operation completed successfully) reboot the machine. If the operating system has booted correctly, go to the Sefthy Console and click on the Next Step button.
4. In the newly restored system, log back in to the Sefthy Agent with the newly generated credentials, then go to the Sefthy Console and click on the Next Step button.
Now you can set backup schedules and manage the device from the Console.
The "Initiate DR" button is displayed only if there is at least one full backup that completed without any warning.
On the DR details page, you can check the latest tasks and their status.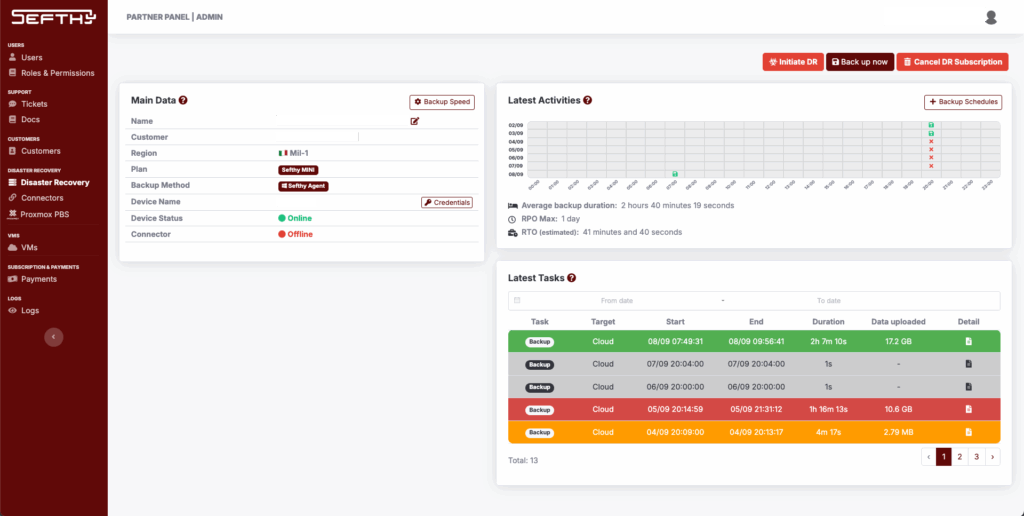
The tasks are highlighted with colors:
- Green, completed successfully
- Orange, completed with warnings
- Gray, terminated unexpectedly or skipped (due to other jobs still running)
- Red, failed
If you encounter any problems, you can open a support ticket at console.sefthy.cloud.
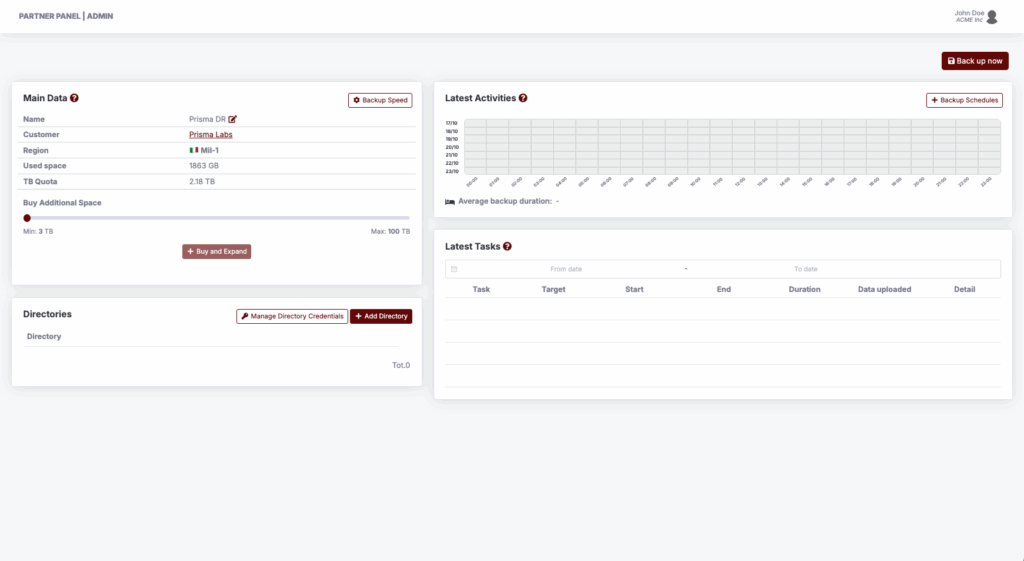
Within each DR we have the ability to customize the scheduling of the Backup Method so that they run at the best times relative to business needs and operations, achieving the best RPO possibile.
By default, Cloud Backup schedules are set as follows each day.
Sefthy plan: 01:00, 07:00, 13:00, 19:00
Sefthy PRO plan: 01:00, 04:00, 07:00, 10:00, 13:00, 16:00, 19:00, 22:00
By clicking on Backup Schedules in the Latest Activities section of our DR, we can select one of the blue column to remove a schedule or click at an empty column to set a new one at that time.
We can also set up Local Backups and DeepVerify, which allows us to periodically check the reliability of files stored securely in the Cloud.
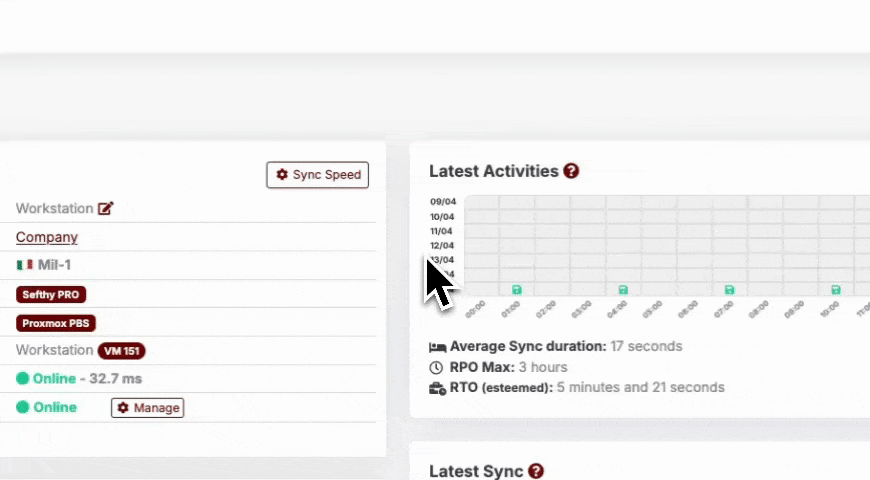
Relative to Proxmox Backup Server as a Backup Method, you can similarly customize sync job schedules.
Within a DR, by clicking on the Backup Speed button, we can change the speed limits of Backups upload, according to our needs.
You can manually configure the limits, or you can do a Speedtest via the Connector and let the values set automatically accordingly.
Doing the Speedtest from the Connector, we check the upload speed of the company and set half of the value as the maximum Backup speed. In any case, the maximum speed can be customized at any time.
In the “Network” section of the Connector, you can change the network card or BRIDGE (in the case of Mikrotik devices) used for Cloud Extension.
Note: It is not possible to manage the network part on Proxmox PBS connectors. Any changes will have to be made through the PBS management interface.
x86 Devices Connectors:
Mikrotik Connectors:
In the Connector WebGUI there is a Diagnostics section, which is useful for troubleshooting network problems.
The tools available are: Ping, Traceroute and Speedtest.
At the bottom of the page, on the right, there is a semi-transparent red button for downloading system logs, which are helpful to attach to a technical ticket if necessary.
On Sefthy PRO plans, an Emergency VPN can be configured in case the Customer site is completely offline or compromised.
The VPN is based on Wireguard and allows you to:
- Remotely access one or more DRs associated with a Connector;
- Surf the Internet with a public IP (for both clients and restored devices).
To proceed with the configuration simply go into Connectors and select the desired Connector. From the detail page you can either manually add users or synchronize them with your own LDAP server (e.g. Microsoft's Active Directory).
In the Configuration box it is essential to set the gateway of the Emergency VPN, otherwise it will be impossible to activate the Emergency VPN. The gateway is the IP address/CIDR of your existing Customer site LAN (where the devices are connected).
The disaster simulation feature allows you to simulate the entire disaster recovery process in a controlled and isolated environment so that you can verify the integrity of the data and the correct functioning of the restored VM.
The process is similar to that used for the Disaster Recovery startup procedure.
- On the DR summary screen, click “Start DR Test”;
- Choose a snapshot from those taken in the last N days provided for in your plan and confirm the disks;
- Wait for the recovery to complete and access the VM via our webVNC.
Limitations:
- The simulation lasts a maximum of 3 hours, after which it is automatically deleted.
- For each DR, a maximum of 4 tests can be started within a month.
The process is performed automatically once a month for the Sefthy plan and 4 times a month for the Sefthy Pro plan.
Upon completion, a report is generated that can be viewed on the DR summary page. In the event of a failure, an email notification is also sent.
This advanced feature is included in the Sefthy and Sefthy PRO plans.
Do you manage multiple servers in the same location? With the DR Orchestration feature, you can define an automatic sequence to restart them in the correct order in the event of disaster recovery. For example, you can ensure that the database server is online before starting the application server.
On the Connector summary page, there is a “Orchestration of DR” panel where you can create automatic actions in case of disaster recovery.
You can build your automation by combining the following actions:
- Start VM – Start the virtual machine after it has been restored.
- Notification – Send a notification email with a custom message. This is useful for being notified when a key step has been completed.
- Wait – Pauses the orchestration for a number of seconds that you define. This gives services or machines time to start up completely before moving on to the next step.
-
Check – Check if a restored machine is online and reachable via Arp-Ping.
In case of failure: You can choose to automatically pause the entire orchestration. This allows you to intervene manually before resuming the process.
Notifications: You can choose to receive a notification email in case of both success and failure of the test.
Sefthy Archive is the backup solution for folders and network shares that complements Disaster Recovery. It is ideal, for example, if you already image your main disk but also want to save data you have on a secondary disk or share.
Please note: Disaster Recovery and Archive plans share the same space.
By accessing the Backup > Archive section of the Sefthy Console, you will find a dedicated item for each of your Disaster Recovery plans.
Within each Archive, the interface is divided into three main areas:
- a summary of the service (space used, maximum available, and expansion option);
- an area to set the resources to be saved;
- the status of the latest events and activities, with the option to customize the schedule.
You can add local folders or network shares, set upload speed limits, and define a custom schedule.
For non-public network folders, you can also specify the necessary login credentials.
The Monitor feature is used to periodically check the reachability status of the Sefthy-protected device by measuring latency and packet loss percentage.
The operation is quite simple: from the network interface connected on the internal LAN, 4 arping requests are made to the device, which if present will respond with its MAC Address, and from the responses received latency and packet loss are calculated.

Operating in Layer 2, arping allows us to check whether a device is actually connected to the network, regardless of some network/firewall misconfigurations of the device, which might limit the responses to the classic ping.
For each user level, whether partner or end user, it is possible to configure receiving notifications through email or Telegram.
To configure Telegram, start a chat with @sefthy_bot and it will print your Telegram ID to insert.
To configure SMTP Server, insert the parameters needed to send the notifications.
When at least one between Telegram and Email is configured, you can click on the Add button in the Alerts/Notifications section and select the type, client (in case your account is Partner), devices and channel through which to receive communications.